Vue 라우터 -5
2018-03-26
Vue Routers
- Vue를 이용한 SPA를 제작할 때 유용한 라우팅 라이브러리
- Vue 코어 라이브러리 외에 Router 라이브러리를 공식 지원하고 있고 아래와 같이 설치한다.
$ npm install vue-router
- 라우터는 기본적으로 RootUrl’/#/’{Router name}의 구조로 되어 있다.
example.com/#/user
- 여기서 # 태그 값을 제외하고 기본 URL 방식으로 요청 때마다 index.html을 받아 라우팅 하려면
const router = new VueRouter({
  routes,
  // 아래와 같이 history 모드를 추가해주면 된다.
  mode: 'history'
})
Nested Routers
- 라우터 화면 이동시 Nested Routers 를 이용하여 여러개의 컴포넌트를 동시에 렌더링 할 수 있다.
- 렌더링 되는 컴포넌트의 구조는 가장 큰 상위의 컴포넌트가 하위의 컴포넌트를 포함하는 Parent-Child 형태와 같다.
<!-- localhost:5000 -->
<div id="app">
  <router-view></router-view>
</div>

<!-- localhost:5000/home -->
<!-- parent component -->
<div>
  <p>Main Component rendered</p>
  <!-- child component -->
  <app-header></app-header>
</div>
주의사항 - Vue Template Root Element
- Vue의 Template에는 최상위 태그 1개만 있어야 렌더가 가능하다.
- 아래는 Template의 HTML 태그를 정의할 때 주의해야 하는 Vue의 성질이다.
// Error
var Foo = {
  template: `
    <div>foo</div>
    <router-view></router-view>
  ` // error
}

// OK
var Foo = {
  // div 태그 안에 텍스트와 'router-view'를 포함하여 정상 동작
  template: `
    <div>foo
    <router-view></router-view>
    </div>
  ` // error
}
Named view
- 라우터로 특정 URL로 이동시, 해당 URL에 해당하는 여러개의 View(컴포넌트)를 동시에 렌더링한다.
- 각 컴포넌트에 해당하는 name속성과 router-view 지정필요
<div id="app">
  <router-view name="nestedHeader"></router-view>
</div>
  {
    path: '/home',
    components: {
      nestedHeader: AppHeader,
      default: Body
    }
  }
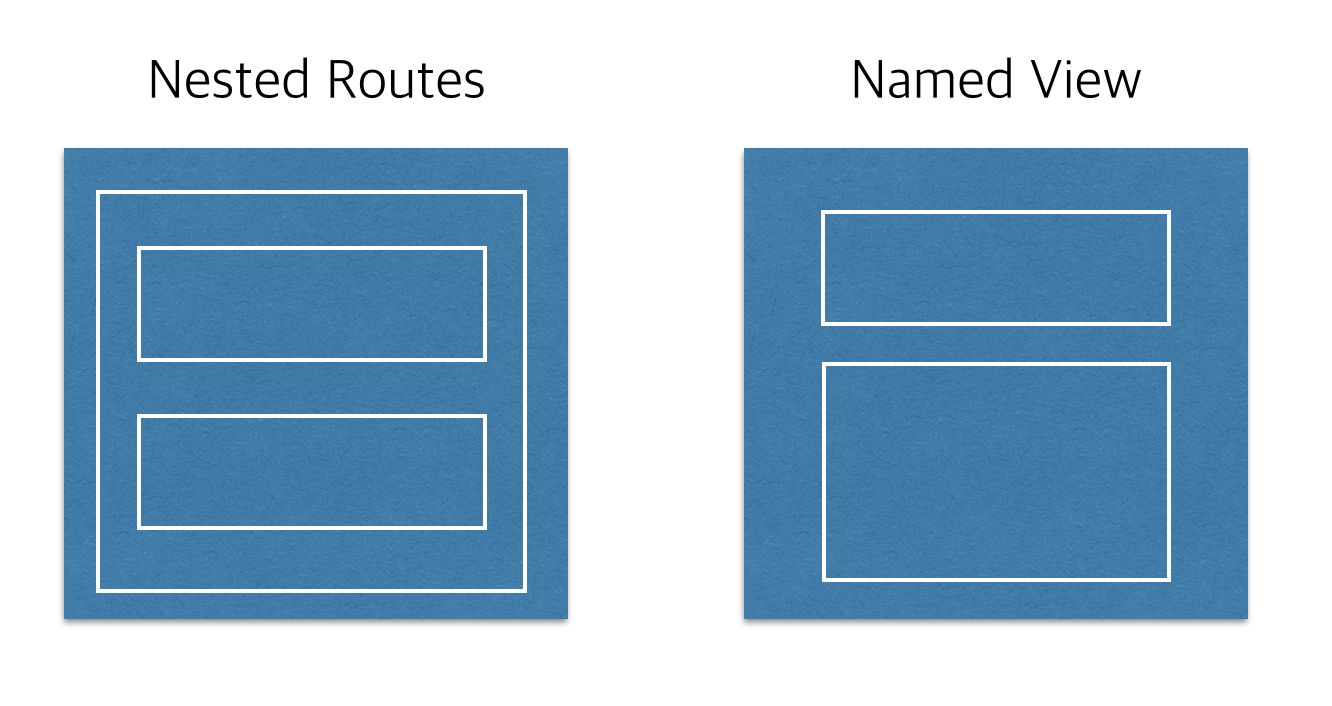
Nested View vs. NAmed View?
- 특정 URL에서 1개의 컴포넌트에 여러 개의 하위 컴포넌트를 갖는 것을 Nested routes
- 특정 URL에서 여러 개의 컴포넌트를 쪼갠 뷰 단위로 렌더링 하는 것을 Named View